Monday, October 28, 2013

BBBB, Grab Buttons for Your Sidebar

Come on in! I'm glad you came. Welcome to my blog and welcome to another installment in the Building a Better Beauty Blog series. The BBBB series is a collaboration with Laurie from the The Makeup Squid. She has written some excellent articles on blog content and organization. You can find a list of all the posts in this series by clicking the BBBB tab just under the header.

FINE PRINT: Beauty bloggers come from all walks of life and have varying degrees of computer knowledge. There is no way to write a single post for all of the different levels of knowledge. In order to provide everyone with the most detailed explanation possible, this post is written as if I am instructing a brand new blogger about this element of blog design. After all, if a blogger is seeking information this post would be of no benefit to them if I left them with more questions than answers. If you have some knowledge of blog design feel free to skim this post and use it as pictorial instructions as it is possible that I could cover an aspect of design that you had not considered before. If you are extremely familiar with this topic please feel free to leave me a comment so that I may learn from your experience. 

In this post we are going to an option to the Blog List widget available through Blogger. As you can see below the Blog List from Blogger is quite generic. The only useful thing is that it does provide you with the each blog's last post and how recently the post was written. It's a handy feature but it just looks so boring. 

Blog List gadget

Personally, I prefer Grab Buttons as they have more character and personality. The only draw back is that it doesn't provide you with any post information. However, if I am looking for new blogs to read I am going to click on the link or the button to actually visit the blog in order to determine if I like their content or not. Below is a picture of my Grab Button. The actual Grab Button is located in the middle of my sidebar. If another blogger wants to add my Grab Button to their blog they would need the code located in the box below the button.

Grab Button
You can grab the code by placing your mouse in the box below the Grab Button and then clicking once. Then hit CTRL and the A (for all) keys at the same time.

Click in box and then hit CTRL and A at the same time

This will highlight all of the text in the box to ensure that you are not missing parts of it. You know that you've done this if your text in the box turns blue. Then you will want to hit CTRL and C to copy the text on your computer's virtual clipboard. Then visit Layout in Blogger.

Selecting Layout to add a Gadget
Then click on Add a Gadget in your sidebar. 


Adding a Gadget to your Sidebar

Choose add HTML/Java Script from the list.

Choosing HTML/Java Script from a list of Gadgets

Then paste the code from your computer's clipboard by clicking inside the content box and hitting CTRL and V on your keyboard at the time time. It will automatically enter the code into the box. 

Adding Grab Button HTML to a sidebar

Now here's were you have a decision to make. If you want Blogger to add text above the picture then type whatever you would like it to say into the title box. The word TRANSLATE is the picture below is an example of a title. 

Translate box with TRANSLATE title

I see no need to add a title above a Grab Button. A bloggers Grab Button should already include text leaving no need to add a title. 

Once you hit the SAVE button you have added another bloggers Grab Button to your blog. Now if you would like to add more than one Grab Button to your blog you can do so by utilizing the same HTML/Java Script box. So after you have added the first Grab Button but before you hit SAVE, open a new window in your browser and visit the second blog from which you would like to add their Grab Button. Find their Grab Button, then click in the text box below their button and hit CTRL and A (for all) to highlight all of the code in blue. Then hit CTRL and C to copy the text. Come back to the HTML/Java Script box. Before you paste the second code into the box you will want to type the following into the box AFTER the first code. <br/>


Add a <br/> break in between Grab Buttons

This stands for break and it adds one line of space in between the first and the second Grab Buttons. As you can see in the example below there is no space in between the Grab Buttons. You will also notice that the Grab Buttons are all several different sizes. 
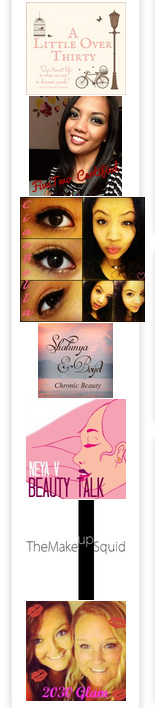
Grab Buttons of different sizes and without <br/> breaks
So let's address how you can make your Grab Buttons uniform in size in order to keep your sidebar looking neat and organized. You can add a specific height and width to any image by altering the HTML. It sounds scary but it's actually quite easy. You will enter height="200" width="200" after the image source which looks like this <img src="https://webaddressofimage.ext" height="200" width="200" alt="name" style="border:none;"/>. Some of the options after the img src might be a little different; but that is nothing to worry about. Do not delete any of those options, insert the height and width as an additional option. 

Adding uniform height and width to Grab Buttons

Now, you may need to play around with the size of the Grab Button a few times to determine what size works best for your sidebar. The larger images in my sidebar are 250 and the smaller images are 125. Now this is where I will respectfully request that Grab Buttons should be square images. This ensures that the image can be easily resized without skewing the image because the height and the width are the same for a square image. If the image is not square it takes several attempts to get the height-width ration correct.

Uniformly sized and spaced Grab Buttons
You might be asking yourself why I have two sizes of Grab Buttons on my blog. For me, if a blogger chooses to swap buttons with me then my Grab Button appears on their blog and theirs appears on mine. Those bloggers are given larger space on my blog. The smaller buttons are blogs that I enjoy reading but my button does not appear on their blog. 

Let me further explain how I manage two different sizes of Grab Buttons. The larger buttons are in a single column and that gadget has the title 'Blogs to Read'. The smaller columns on the right and the left have no title because I don't words between the large and small buttons. I will also explain that all of my larger buttons are in one gadget box with a <br/> in between each of them. The same goes for all of the smaller buttons on the left and the same for the smaller buttons on the right. Therefore, I have 3 different gadgets containing Grab Buttons. 


Thank you so much for sticking with me during this tutorial. I hope this addresses some of the problems you may experience when installing other blogger's Grab Buttons on your blog. In the next post I will discuss how to create your very own Grab Button and how to add the coding underneath so that other bloggers can add your button to their blog. 

Please remember that all posts in the Building a Better Beauty Blog from both Laurie and myself can be found in the tab at the top of my blog. Please subscribe to both of our blogs to ensure you won't miss any future posts in the BBBB series. If you are an experienced WordPress blogger and would like to join Laurie and I in this series please feel free to leave a comment below. We would love to have the WordPress options available in this series as well. This post has been very long therefore I am choosing to skip my usual blog closure. Please go forth and conquer the world with peace and love. 


Sunday, October 27, 2013

Home Alone, What's a Girl To Do?

Welcome to my quirky little blog where everyone is welcome. It doesn't matter if we like the same things, dislike the same things or are indifferent to the same or different things. I welcome all opinions and thoughts so please feel free to leave me some of your thoughts in the form of a comment at the bottom of this post.

So I find myself home alone on a Saturday night. Boyet is working, my family has plans, and the house is quiet. I could be doing laundry, I should be doing something productive but instead I think I will give myself a bit of pampering. I decided to enjoy some me time.


Since I was home all day, doing things around the house I hadn't put on any makeup. So since I wasn't wearing makeup I started by washing my face with Simple Moisturizing Face Wash. I really like this face wash. I wish it had a bit more lather but it does a good job of getting my face really clean without leaving it feeling dry and tight. Next I moved on their Smoothing Facial Scrub. I really enjoy this scrub as it gently leaves my skin feeling smooth. I prefer a few more scrubbies than this one has but it's a still great product that is gentle on your skin.


Next, I put the Olay Deep Cleansing Clay Mask on and began taking some photos for this post. Which reminds me that I will be doing a blog post giving tips on taking and editing photos. Apparently, today I felt like going with square photos. 


Of course, I had to take a selfie to show you my lovely blue face! I really enjoy this clay mask which tightens as it dries. However, it does not leave your skin feeling tight afterwards. This mask does a great job of getting into your pores because when I remove the mask it takes a little extra effort to get all the mask out of my pores. Go Olay! Get in those pores, get all the ickies out!


Then I remembered that my beautiful blogger buddy, Saffron from Saffy Style, had mentioned having a drink while watching moves. So I decided I could have a drink too and made myself a peach, banana and strawberry smoothie with an adult twist. So I added a splash of peach vodka. Then it was time to take a nice, long, hot soak in the tub. So I put my drink into a plastic glass instead of a fancy grown up one because I am such a klutz. I'll be honest, I prefer my bath without broken glass. 


Mood lighting! Ahhhh yes! I have one of the Air Wick color changing candles and they are really cool. There is a glowing LED light buried in the candle wax and it changes colors while the candle is burning. It's so amazing it's a fun and relaxing touch for a long soak. 


 I don't typically use Bath and Body Works products on a daily basis but I do enjoy them. I always have a few on hand and decided that Midnight Pomegranate was perfect. It's described by Bath and Body Works as "Midnight Pomegranate is a fiery, fruit & spice fragrance inspired by rubies sparkling in moonlight!" It's a perfect scent for fall as it's so rich and deep. 


As soon as I got out of the bath I immediately rubbed on Neutrogena Body Oil. This stuff is so amazing because it's not greasy at all. You don't have to worry about it leaving a greasy residue on your clothes or furniture. I really enjoy it when the weather starts getting colder as it really sinks into the skin leaving it feeling really moisturized. Boyet prefers I purchase the fragrance free version as he says is reminds him of graveyards. Apparently ylang ylang grew in or near graveyards when he was a child, and the smell of the scented version reminds him of that. 


 After giving that a few minutes to soak into my skin I added a thick layer of body butter. This is by far my favorite moisturizer from Bath and Body Works. It's so thick and creamy so it does take a bit to really sink into the skin which I didn't mind as I was pampering myself. I finished it off with a spritz of the body mist and proceeded to enjoy the rest of my evening. 

Sadly, I woke this morning coughing and congested which I can deal with; but I am also having a flare up of my Chiari symptoms as well. The cough and congestion are typical change of the weather symptoms for me. The Chiari symptoms are causing my head pound like someone is hitting it with a sledgehammer. The combination of the two together are too much. The pain is on the border of being unbearable. My head, neck and shoulders hurt so much, Sounds hurt my ears, light hurts my eyes, I'm on the verge of throwing up, and I can't keep my arms and legs will not stay still. Today is pure torture and I want to give up. But I won't. I will fight through. I can do this. I have to.


  • Update: I have taken a long nap and am feeling better. On a scale of one to ten, I'm currently at a 7 whereas I was at a 10 before. So 7 is really good. On a daily basis I am at 3 or 4. 
  • We're Talking about: The fact that Boyet takes such great care of me. He gives me massages, holds my hair when...um you know, gets what I need, and anything else. He's amazing. (♥‿♥✿)
  • We're Praying about: It means the world to me to say that Boyet was praying for me while I was in such pain. I am blessed. (;_・✿)
  • We're Laughing about: We're not laughing today, still too much pain. 
  • Keep following us here, on Facebook, Twitter, and Instagram. 


  • Friday, October 25, 2013

    BBBB, What Exactly is a Gadget?

    Welcome back to another episode of Building a Better Beauty Blog. This collaboration with Laurie from the The Makeup Squid is aimed at helping beauty bloggers build a better blog. Laurie has been publishing some excellent articles on how to write and organize blog posts. I found that I was helping a few of my blogger friends create elements specific to their blog. So we decided to team together to create the BBBB (Building a Better Beauty Blog) series.

    NOTE: Beauty bloggers come from all walks of life and have varying degrees of computer knowledge. There is no way to write a single post for all of the different levels of knowledge. In order to provide everyone with the most detailed explanation possible, this post is written as if I am instructing a brand new blogger about this element of blog design. After all, if a blogger is seeking information this post would be of no benefit to them if I left them with more questions than answers. If you have some knowledge of blog design feel free to skim this post and use it as pictorial instructions as it is possible that I could cover an aspect of design that you had not considered before. If you are extremely familiar with this topic please feel free to leave me a comment so that I may learn from your experience. 

    Today we will be discussing the necessary gadgets for your blog. More specifically, we will be discussing the premade gadgets offered by Blogger. While these gadget are less personal and more cookie cutter, they can still be very helpful in providing your readers important information about your blog. These can be extremely helpful in providing your readers with information while providing you with some time to develop a more personalized gadget. Bare with me as this post will be long; but I didn't want to split it up into two parts. I wanted to keep all the gadgets together so that you can refer back to them as needed. I will define these gadgets by using the following four categories.

    Necessary - Provides great information to keep your readers engaged and informed
    Helpful - Can be of assistance to yourself or your readers
    Interesting - Not necessary but can be fun or of interest to your readers
    Pointless - Don't bother with these they just take up space in your blog

    If you are looking at your blog from the internet, not from Blogger, you will notice tools in the bottom right corner of each widget. This provides you with an easy method with which to alter or change your gadget.

    1. +1 Button - POINTLESS -  This allows readers to publicly recommend your blog. I don't have this gadget active on my blog for two reasons. I think it looks silly on the sidebar and because I would rather my readers recommend particular posts rather than my entire blog. Plus if your NAVBAR has not been removed from the top of your blog then the button remains at the top of your blog. No need to be repetitive. 

    +1 Button

    +1 Button on Navbar


    2. Google+ Followers -  NECESSARY - This allows readers to follow you on Google+ which makes it easy for them to see when you make new posts or even when you comment on other's blogs.  Google+ is now the third most popular social media behind Facebook and Twitter. This is good news for bloggers because Google+ makes commenting and sharing blogs so easy. Do not confuse Google+ Followers with Google Friend Connect (GFC), which is no longer available as a Blogger gadget. New blogs will not have access to add the GFC gadget. GFC made it easy to follow blogs with Google Reader which is now defunct. While the gadget will still work if you have it installed it is less than stellar as Google Reader is now gone. I will devote a future post to readers which will further address this situation. 

    Google+ Followers

    3. Google+ Badge - POINTLESS - This gadget allows readers to follow your blog on Google+ simply by clicking this button. However, if you have the Google + Followers gadget, which you should have, then this gadget is redundant as the same button exists there too. You can clearly see the same button exists in the photo above. 


    Google+ Badge
    4. Translate - HELPFUL - If your blog is written in a language other than English or is read by readers all over the world who do not read English this gadget will allow your reader to translate your blog into their native language. 

    Translate
    5. Follow by email - NECESSARY - This is a very useful tool for those who wish to follow your blog without the need for using Google+ or a feed reader. Every time a new post is published on your blog the subscriber will receive an email alerting them about the post. This is particularly helpful for readers, like your family or personal friends, who don't read a lot of blogs as a whole but they want to read yours because it is written by you. 

    Follow By Email


    6. Popular Posts - NECESSARY - This is a cool gadget that allows you to highlight a set number of most popular posts from the past 7 days, 30 days or all time. It's a great way to show your readers which posts your other readers are enjoying. There are some really amazing external widgets, not available through Blogger, that require a little more effort to install. I will cover those external widgets in a future blog post. In the meantime, you'll want to include the standard Blogger Popular Posts gadget on your blog.

    Popular Posts

    7. Blog Stats - INTERESTING - This handy little gadget will alert your readers as to the total number of views your blog has received.  Of course the higher the number of total page views the more popular your blog. If you are just starting your blog you probably do not want to utilize this gadget. I personally have never and will never use this gadget. I utilize another gadget that provides more pertinent information. I will also discuss this in a future blog post. 

    Blog Stats


    8. Pages - HELPFUL - Pages can be used to provide your readers with additional information. Sometimes you need a space larger than a small box in the sidebar to give readers a better picture of whatever you would like to convey to them. I have pages highlighting my photography, my illness and my poetry. Pages can either be placed on the tabs between the header and the body, in the sidebar or below the bottom post. I will go into further detail about tabs, pages, and labels in a future post. 


    Pages Listed on Blog Tabs

    Pages Listed Below the Bottom Post
    9. Adsense - PERSONAL CHOICE - This is a way to monetize (make money) from your blog by adding ads with Google Adsense. I recently chose to monetize my blog mostly because I was curious how it works rather than expecting to make a large salary from it. I have yet to see any results but I will keep you updated on the situation. There are other ways to monetize your blog and I will discuss those in a future blog post as well. 

    Blog Adsense


    10. Search Box - NECESSARY - The search box gadget is an incredibly useful tool for both your readers and for you as it allows you to quickly find a specific post, determine if a blog writer has posted on a specific topic, or determine if the blog writer has been given a specific award. I use my own search gadget quite often and I frequently use other blogger's search gadget as well particularly if I am nominating them for a tag or an award. It's a must have for any blog. 

    Search Box
    11. HTML/Java Script - HELPFUL - This gadget allows you to add external gadgets written by sources other than Blogger. For instance the 'Grab My Button' gadget on my sidebar is a third party gadget. In a future post I will delve into some necessary items you need to add using the HTML/Java Script gadget.


    12. Text - HELPFUL - A text box can be used for anything you would like to say to your readers. If you would like to permanently place a quote, poetry or other text on your sidebar this is the easiest way to add it. 

    Text
    13. Image - HELPFUL - This is a handy gadget that allows you to add a photo to your sidebar. This is the gadget I used for my about me image that I use in lieu of the profile box. I will cover creating a more personalized profile image in a future blog post. 

    Blog Image

    14. Slideshow - INTERESTING -  I have used this gadget in the past and I truly enjoyed it as it simply scrolls through the photos you choose to include. It's a fun gadget that adds a personal touch to your blog. However, I find it a bit distracting as the pictures scroll through I find myself wanting to watch the pictures rather than reading the posts. The images do not link to previous blog posts so they serve a useful purpose. 

    Blog Slideshow

    15. Video Bar - HELPFUL - This is a necessary tool for those that have a YouTube channel that correlates to their blog. It's a great way of highlighting your videos in the sidebar. With one easy click your readers can easily move to your YouTube channel.  

    Video Bar


    16. Poll - INTERESTING - A poll can be used to ask your readers a multiple choice question. Adding a poll can help you find out readers' preferences on a specific topic. This could be a useful tool if you are trying to determine what your readers would like to see in future posts. 

    Poll
    17. Blog List - NECESSARY - A blog list can be used to show your readers what blogs you enjoy reading and it provides them an easy way to visit those blogs. It's also a great way to show your support to your fellow bloggers. In addition to listing the blogs you are reading it also shows the title of their last post. I prefer to use a blogger's custom 'Grab My Button' rather than a blog list as I find it's more interesting and personal. I will show you how to create your own 'Grab My Button' as well as how to standardize other's buttons in a future blog post. 

    Blog List


    18. Link List - HELPFUL - A link list can be used to provide your readers with links to websites that are pertinent to your blog. It can help them easily navigate to these websites directly from your blog. Personally, I don't mind my readers leaving to go to other blogs but I don't want them to leave my blog to go to a commercial website. Therefore, I choose not to utilize this gadget. 

    Link List


    19. List - INTERESTING - A list can be used to list any thing you would like to list. A blog list and a link list both contain clickable links whereas a list is not clickable. It is strictly for information purposes only. You can list anything you would like however I would highly recommend it be pertinent to your blog. For this list I have chosen to list my top five products under $5.00, if I were actually including this list on my blog I would create an image rather than just a written list.  

    List

    20. Feed - POINTLESS - This provides your reader with the titles and links to the last 5, or any number of your choosing, posts published to your blog. I prefer utilizing the blog archive and popular posts widgets over the feed gadget. I will cover feed and feed readers in a future post. 

    Feed


    21. Newsreel - INTERESTING - This widget allows you and your readers to keep abreast of current news about topics of your choosing. As you can see, you can choose topics that are relevant to your blog which could be of interest to you and your readers. Personally, I choose not to use this widget as I don't find it useful enough to take up space on my sidebar. 

    Newsreel 


    22. Labels - INTERESTING/POINTLESS - Labels are tags that we can use to organize our posts by specific topics. I love using labels as it helps Google locate and recommend your blog among the sea of other blogs when someone goes searching for something specific; but I don't find the labels gadget useful as I have too many labels. In a future post I can show you a tool to help you see what key words readers search for when Google recommends your blog. I don't like showing my labels in a widget because I tend to use very specific labels which means I use a lot of labels. The list below only covers labels that begin with A and B; you can imagine how long my label list is. 

    Labels

    23. Subscription Links -  No longer valid. This gadget allowed readers to subscribe to your posts or your comments. Avid blog readers now use a feed reader to follow their favorite blogs.

    24. Logo - POINTLESS - Why? Just, why?  Don't waste your sidebar space. 

    Logo

    25. Profile - NECESSARY - You want your readers to be able to quickly identify with you and your blog's brand. Having the 'Profile' gadget gives readers a quick and easy way to learn about you. If you are using the profile gadget make sure your profile speaks truthfully to who you are and what your blog is about. In lieu of the this gadget I have chosen to use a custom made image that provides information about my blog. Use this widget until you are able to create a custom profile image. I will cover creating a custom profile image in a post in the near future. 

    Profile


    26. Blog Archive - HELPFUL - This gadget shows readers a clickable list of all the post titles from the current month. It also lists all the previous months and years since the creation of your blog. In my opinion this is extremely helpful as it shows your readers how frequently you blog and it allows them an easy way to see your most recent blog titles. It also allows your readers a way to quickly determine what you were blogging about in the past. 
    Blog Archive


    27. Blog Header - NECESSARY - This widget allows you to utilize an image rather than generic text. It's a necessity for helping your blog stand out from other blogs. I will show you in a future post how to create a header image that speaks clearly to the title of your blog. 

    Header Image

    Header Text


    28. Attribution - POINTLESS - This widget explains that your blog is 'Powered by Blogger.' In a future blog post I will show you how you can remove this widget from your blog. 

    Attribution
    Thank you so much for sticking with me in this very long post. If you are interested my previous post on Building a Better Beauty Blog, The Basics can be found here. 

    Please go check out Laurie's posts for the Building a Better Beauty Blog series:

    She also has a fantastic post about Starting a YouTube Channel, Things You Should Know.


  • We're Talking about: My doctor's appointment today. I had to meet my new doctor and get my massive supply of drugs refilled. My condition is rare enough that I had to explain it to my doctor. I will need to go back next week for blood draws. (´_`)
  • We're Praying about: A few friends that need surgery. Know that we are praying for you.    (−_−;)
  • We're Laughing about: Boyet's favorite video. http://www.youtube.com/watch?v=UjXi6X-moxE。 (-^〇^-)
  • Keep following us here, on Facebook, Twitter, and Instagram.